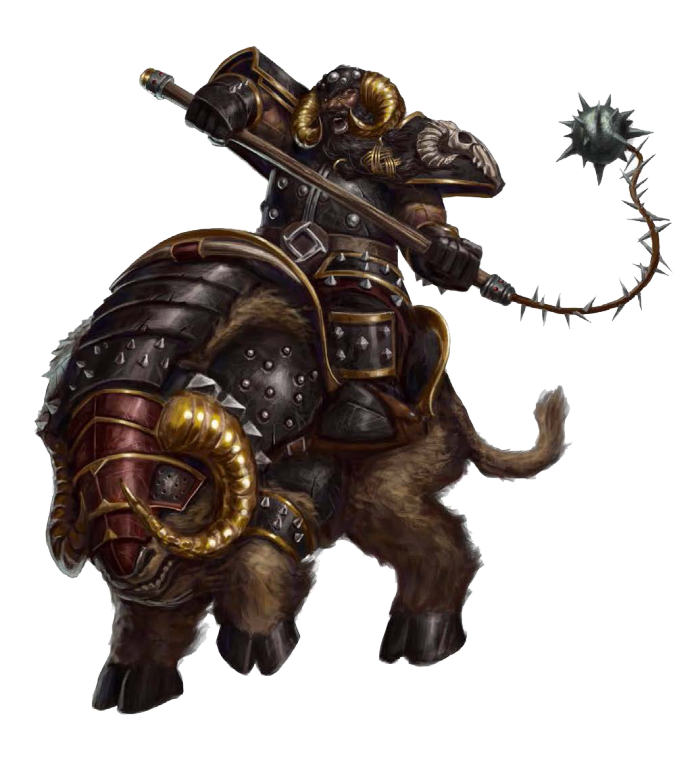
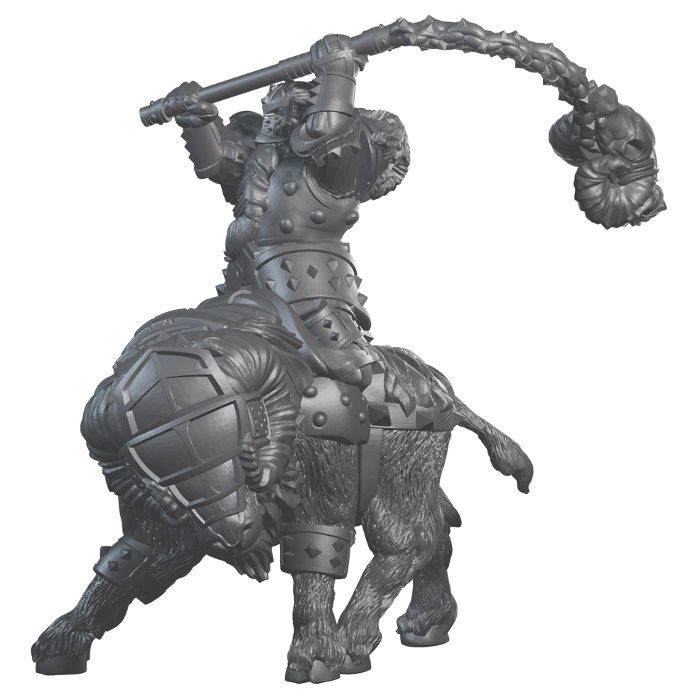
Tribe of the Dawn
- News
- Forum
- Links

- Chronopia?
- Articles
- Gallery
- Downloads

The Factions:
Blackblood Devout Dwarven
Elven Firstborn Sons of Kronos
Stygian Swamp Goblins  
Chronopia on Facebook
Chronopia on Discord
back to startsite

Article print

Goblin Myrmadon

Faction: Blackblood

Unlike the Bull Myrmadons, the Myrmadons of the eastern range are larger and much more difficult to control. Possessed of massive strength, a Myrmadon is the perfect line-breaking weapon as its thick hide makes it impervious to all but the most direct blows. Ridden by five Goblins, these beasts are given a specially prepared mixture of herbs that increases their ferocity and makes them rampaging monstrosities in combat. As any Goblin will tell you, the controller known as the Mahout, doesn’t so much control the beast as steer it in the right direction and hope it obeys. Certain Ogre Raj’s actually disdain the Goblin Myrmadons in their army, for they can cause considerable damage to their own side. The risk is not always worthwhile.


Goblin Myrmadon
Goblin Myrmadon
© 1998 Target Games

Concept Art
Concept Art


Unit Rules from the 2.Edition.

Article print Type: Close Combat Individual

Spearmen (2)
CCRCPWLDACST
98-10 23
Archers (2)
CCRCPWLDACST
89-10 23
Myrmadon & Mahout (1)
CCRCPWLDACST
138-10 29
Combined
WDMVARDEFSZCT
6525 +15130

Special Rules:
- Steadfast
- Trample, DAM 14
- The Goblin Archers my fire at opponents in Close Combat with the Myrmadon without penalty. However, if other friendly models are engaged in Close Combat along with the Myrmadon, normal rules for firing into Close Combat apply.
- Goblin Spearmen each have a combat arc of 180 degrees to the side of the Myrmadon and are always considered Braced.
- Individual Goblin riders may not be singled out for attack; the massive raging Myrmadons is an enemy warrior`s primary concern. However, since the Goblin Riders are lashed onto the back of the Myrmadon, when the Myrmadon is slain its death throes crush its riders without exception, assuring no survivors.

Myrmadon diagram:
Myrmadon diagram
Myrmadon´s Front Combat Arc is A & B.
Myrmadon´s Rear Combat Arc is C & D.
Spearmen on left have front facing of A & C.
Spearmen on right have front facing of B & D.
Archers may fire into all four quadrants.

Controlling the Goblin Myrmadon:
While the Goblin Myrmadon is a ferocious killing machine and trained for battle, it is quite difficult to control. So difficult to control are the that a controller (called a Mahout) spends months learning the skills neccessary for keeping this behemoths rage under control.
One a Goblin Myrmadon receives its third wound, the Mahout must make an LD test each activation to determine if he was able to control the beasts impending Rampage. If he succeeds he has managed to continue controlling the beast. Should it fail the beast has slipped into the haze of battle and will begin to rampage out of control. When the Myrmadon begins Rampaging, place a Rampage counter beside it and roll on the chart below to see what actions it will take. A Mahout may try to regain controll of the Myrmadon on a subsequent activation by rolling his LD at a -2 when it first activates. If it fails again, another roll on the table must be made.

Rampage Table:
1-4 The Myrmadon moves directly to the nearest enemy model in LOS and attempts to kill it with its tusks and tail. It will Trample anything in its way until all its activations are spent or it encounter and impassable obstruction. Riders may attack when oppurtune. Should the Myrmadon kill its target it will move in a straight line to the next closest enemy target in LOS.
5-8 The Myrmadon attempts to Trample the nearest enemy model in LOS. It will Trample anything in its way until all its activations are spent or it encounters and impassable obstruction. Riders may attack when opportune. Should the Myrmadon kill its target it will move in a straight line to the next closest enemy target in LOS.
9-12 The Myrmadon will attack the nearest model with its tusks and tail attacks. It will Trample anything in its way until all its activations are spent or it encounters and impassable obstruction. Riders may attack when opportune. Should the Myrmadon kill its target it will move in a straight line to the next closest target in LOS.
13-16 The Myrmadon attempts to Trample the nearest model in LOS. It will Trample anything in its way until all its activations are spent or it encounters and impassable obstruction. Riders may not attack because of the great heaving lurches of the beast. Should the Myrmadon kill its target it will move in a straight line to the next closest target in LOS.
17-20 The Myrmadon has flown into a fit of uncontrollable rage. It will hurl itself down on the ground and crush any Riders on its back and any model in base to base contact with it. If a model(s) in base to base contact can Dive for Cover they may or suffer a DAM 20 hit. The Riders will all be killed should this happen. Subsequent turns, should the Myrmadon be alive, will have it roll on the Rampage table again ignoring this result (which should be re-rolled).

Equipment:
- Goblin Mahouts are NOT armed.
- Goblin Spearmen are each armed with a Spear.
- Goblin Archer are each armed with a Shortbow.
- Myrmadons have a Tusk Attack, Natural Weapon - (1x) Tusk (12(x2)) and a Tail Mace, Natural Weapon - (1x) Tail Mace (10)

Classification:
Mortal and Beast

NameCCMDMXDAMNotes
SpearCC--ST+5
Shortbow714215ROF=1/1


Goblin Myrmadon Model Review

Reviewed by Graham Tunnicliffe. (1998)

Tarec kicked the Goblin corpse once more for good measure and glanced down the battle line. All along the line his firstborn warriorswere exchanging jokes as they heaped the corpses onto a pyre for burning. Their crossbows and maces had repulsed five waves of the vermin with minimal losses and Tarec was certain that they could hold until Greya returned with enough men to carry the fight to the Blackbloods.

Having flung the goblin onto the pyre, Tarec stepped in front of the line of men, turned to face them and held up his hands to quiet them. When he had silence, he spoke:
"My Brothers, once more our foe has failed to drive us back. Soon Greya will return with the Knights and we will finally rid this place of the taint of the Blackbloods. Until then, we must defend. This town must not fall, but how can it? We have the finest troops in the world, and our opponent has only………."

Tarecs’ speech was cut short by a sound like the rumbling of distant thunder. Instinctively he turned to face the direction of the noise - and the blood froze in his veins.

Moving towards the Firstborn position were a dozen beasts, their sharpened tusks slashing impatiently at the ground in anticipation of the coming slaughter. Each ponderous step the creatures took seemed lightning fast to Tarec in his dazed state, and the beasts closed, their goblin handlers goading them forward and the rest of the crew screaming curses as they readied their weapons. Suddenly, Tarec snapped out of the confusion that gripped him, and raised his voice so that all the men could hear clearly,
"Form up" he shouted, "make every quarrel count. Aim for the handler. And pray".

The Firstborn stood silently, impassively waiting for the moment that their world would erupt into pain and death.
The Myrmadons had arrived.


Goblin Myrmadon
Cover from the Heartbreaker Miniatures Box

The Goblin Myrmadon adds a nice new bite to the Blackblood army and certainly demands attention from your opponent. The figure is a multi-part casting - the Myrmadon itself is a 6 piece casting, including the base, and the crew consists of five goblins, one handler, two bowmen and two spearmen. The nice thing here is that all of the goblins have individual poses, so the model has a more "real" feel than if the crew were identically cast. More about these crewmen later.

The Myrmadon required little cleaning before assembly and it went together quite nicely with no real need for additional filling. If a criticism had to be levelled at it at this point, it is that the two halves of the body are hollow, which means that when the Myrmadon is assembled, anyone viewing it from the base will see it as an empty shell. It makes not a jot of difference on the battlefield, but I just got the feeling that something was missing from my figure. Still, you’ve always got somewhere to hide your midget gems!

As far as the animation of the figure goes, this is a winner. The Myrmadon itself looks a little static but this is more than compensated for by the goblins, who are fabulously animated! Each one has a unique expression and pose, the archers looking like they’ve just fired, the spearmen poised to strike when the beast enters melee, and the handler resting almost lazily at the animals neck, goad in hand. All the little blighters wear permanent scowls too, which enhances the overall effect of a war beast driven to battle by its’ bloodthirsty crew. When placed on the Myrmadon, the goblins bring the whole thing to life.

As anyone who knows me will confirm, painting is not my strong point, I can make a figure look OK, but not exceptional. Fortunately, I have buddies who are demons with a paint brush, and we operate on a figures for beer barter system. Still, I thought I’d have a go with the Myrmadon, using the box as my guide. The best option here is to stick to earth colours, such as browns and greens, with a splash of bold colour for the Myrmadons’ decorative faceplate and armour. The goblins too, should benefit from a similar colour scheme, and perhaps by (as I did) adding coloured banners to the spears.

Now we come to my major moan about an otherwise excellent figure. It’s the price. At £17.95 it seems a bit steep to me and the few people I asked to guess the price all placed it a few pounds below that (all in the £13 - £15 range). I imagine that compared to other similarly sized models from other manufacturers, the Myrmadon fares well on price, but it seems out of step with the prices of the rest of the Heartbreaker Range.

However, this really is the only sore point on what is otherwise a very nice figure. If you find yourself particularly flush, and play a Blackblood army, then I heartily recommend the investment. It’s amazing how much your opponent will throw at the thing to stop it, and while they are doing that, they’re ignoring your unit of Crimson Blades………

Animation 8 out of 10
Detail 7 out of 10
Value 5 out of 10
Overall 7 out of 10


Comments


  No comments.


  Comment
Name:
Text:
10 * 3 = No Spam
 

First version from 09.12.2012. Last Version from 15.12.2012.

© 2005 - 2022 www.chronopiaworld.com - to Chronopia Deutschland
Disclaimer & Contact